SAS Enterprise Session Monitor Administration Guide for Windows
SAS Enterprise Session Monitor Server
System Requirements
Hardware Requirements
For information about the recommended hardware requirements for your environment, please refer to the sizing your SAS Enterprise Session Monitor Server section.
The minimum system requirements to run the SAS Enterprise Session Monitor Server are:
- 2 vCPUs
- 6 GB RAM
- 10 GB disk
Supported Versions of Windows
- Windows Server 2008 32bit (Service Pack 1 minimum)
- Windows Server 2008 R2 64bit (Any Service Pack)
- Windows Server 2012 64bit (Any Service Pack)
- Windows Server 2016
- Windows Server 2019
The following platforms are also known to work with SAS Enterprise Session Monitor server (for testing purposes):
- Windows XP Professional SP3 32bit
- Windows 7 64bit
- Windows 8
- Windows 10
Installation Requirements
-
Approximately 1.5GB disk space for the SAS Enterprise Session Monitor server installation files
- SAS Enterprise Session Monitor Server Installer compressed (318MB)
- SAS Enterprise Session Monitor Server Installer unpacked (390MB)
- SAS Enterprise Session Monitor Server Installed (775MB)
-
50GB – 100GB disk space/tablespace for selected database storage
- Storage requirements vary depending on the number of nodes and sessions/jobs monitored
- SAS Enterprise Session Monitor data collection intervals and metric resolutions are configurable, both of which affect the storage required
- SAS Enterprise Session Monitor has a configurable automated maintenance schedule to manage and maintain storage
- Where possible, choose dynamically sized disk space/tablespace which can be adjusted according to demand.
- For a more detailed breakdown of storage requirements, or if you have a complex/large environment please contact SAS Technical Support for further information
-
Ports – If a firewall is configured, the following ports will need to be opened for communication between the SAS Enterprise Session Monitor agent(s) and the SAS Enterprise Session Monitor server. The default ports are listed below, custom ports can be specified during installation if required
- 18080 – default HTTP port for SAS Enterprise Session Monitor communication
- 18181 – default HTTPS port for SAS Enterprise Session Monitor communication
- 14848 – default SAS Enterprise Session Monitor administration port
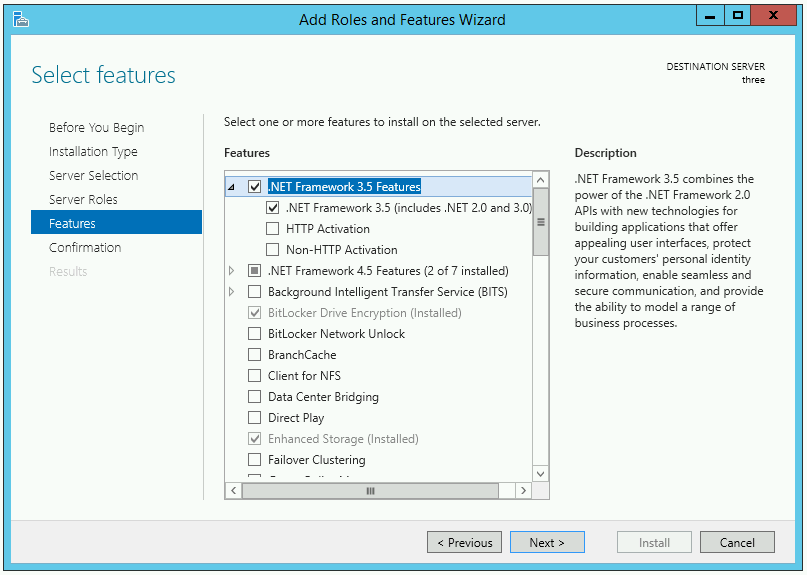
.NET Framework 3.5 (Including .NET 2.0 and 3.0)
The .NET Framework packages are required by the SAS Enterprise Session Monitor Server Installation Wizard. On later versions of Windows Server (2012 onwards), they can be enabled using the Add Roles and Features Wizard.
Microsoft Visual C++ Redistributable Packages
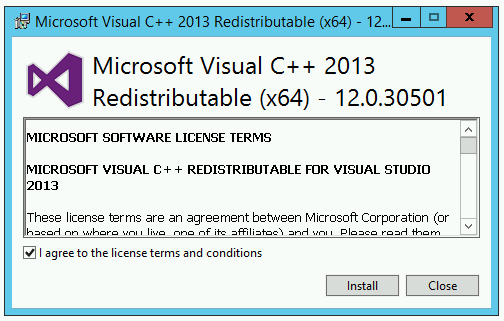
The Microsoft Visual C++ Redistributable Packages are required by the SAS Enterprise Session Monitor Embedded Database (PostgreSQL 9.5). A version is included with the SAS Enterprise Session Monitor Server packages, under third_party/vcredist_x64.exe. Alternatively, it can be downloaded directly from the Microsoft website.
Ports
If a firewall is configured, the mandatory ports in the following table will need to be opened for communication between the SAS Enterprise Session Monitor agent(s) and the server. The default ports are listed below. Custom ports can be specified during installation if required:
| Port | Description | Mandatory | Notes |
|---|---|---|---|
| 18082 | Default gRPC port for SAS Enterprise Session Monitor communication | ||
| 14848 | Default GlassFish administration port | For debug purposes | |
| 15432 | Default Database JDBC connection port | When configuring DB replication |
In addition, the following ports should be opened for communication between the SAS Enterprise Session Monitor server and user(s) web browsers. The default port(s) are listed below but custom ports can be specified during the installation if required:
| Port | Description | Mandatory | Notes |
|---|---|---|---|
| 18080 | Default HTTP port for SAS Enterprise Session Monitor communication | Default user interface port | |
| 18181 | Default HTTPS port for SAS Enterprise Session Monitor communication | For embedded HTTPS |
Note that correct functioning of embedded HTTPS requires manual post-installation configuration of certificates. Configuration with a standalone reverse proxy is also supported. For details contact SAS Technical Support.
For larger deployments where the SAS Enterprise Session Monitor Embedded Database is clustered across multiple hosts, more detailed firewall configuration may be required.
User Accounts
An Operating System account is required to run SAS Enterprise Session Monitor Server. SAS Enterprise Session Monitor requires an account with the following properties:
-
Administrator rights
-
A centrally managed or non-expiring password (recommended)
-
Run as service capability
-
Read and Write access to the target installation directory and sub directories
Server Installation
Unpacking the SAS Enterprise Session Monitor Server Installation package
-
Log on to the server using the nominated account with the required installation privileges (see installation requirements for more details)
-
Download the appropriate SAS Enterprise Session Monitor Server installation package for your Windows operating system. Installation packages can be obtained by signing in to the Boemska Downloads site at https://downloads.boemskats.com/esm or by contacting SAS Technical Support.
-
Unpack the archive to a suitable temporary location. This guide assumes a target location of
C:\esm-server-installer
Running the Installation Wizard
Double-clicking on the esm-server-setup.exe executable will start the SAS Enterprise Session Monitor Server Installation Wizard.
Note
You may be prompted to grant the SAS Enterprise Session Monitor Installation Wizard elevated privileges. This is required in order to deploy the SAS Enterprise Session Monitor Server application as a Windows Service.
-
You will be presented with a Welcome Screen.
 Click Next.
 -
You will now be presented with a License Agreement. You must agree to the terms set out in the license agreement in order to continue with the installation, by clicking the I Agree button.

-
Next, you will be presented with a choice of database. Unless otherwise instructed by SAS Technical Support, select the
Embeddedoption.
Enter theusernameandpasswordto set the credentials for the embedded database. In most cases, it is sufficient to change the password if required and otherwise using the default values provided. -
The default Embedded database port is 15432. Unless this port is taken by another application running on the local machine, click Next.

-
Configure the ports you would like the SAS Enterprise Session Monitor Server Web Application to use when accepting incoming connections. The default ports are recommended, but may be changed if there is a conflict with another application running on the local machine. As per the note above, only the HTTP and optionally the HTTPS port (shown as the default 18080 and 18181 here) need to be externally accessible.

Click Next. -
Choose a Username and Password for the SAS Enterprise Session Monitor Web Application Administrative User. This is used to access the administrative functionality of SAS Enterprise Session Monitor via the web browser. Keep these details safe.

Click Next. -
You are now prompted to create a Windows service for the SAS Enterprise Session Monitor Server and start it after installation. Service creation is recommended, however this option can be unchecked if you wish to start the SAS Enterprise Session Monitor Server manually or via another scripted method.

Click Next -
Specify the target install location for the SAS Enterprise Session Monitor Server using the file browser, ensuring that sufficient disk space is available. A new folder can be created from the browse window if necessary, for example
c:\esm. The installer will automatically create anesm-serversubfolder within the selected destination folder (e.g.c:\esm\esm-server)
Click Next -
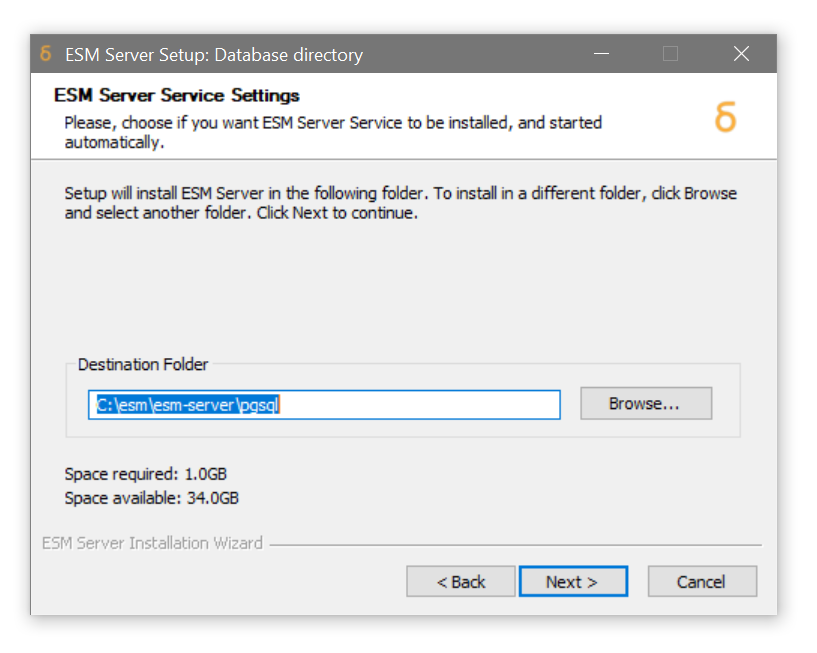
Specify the target install location for the embedded database binaries, if it differs from the SAS Enterprise Session Monitor server.
Click Next -
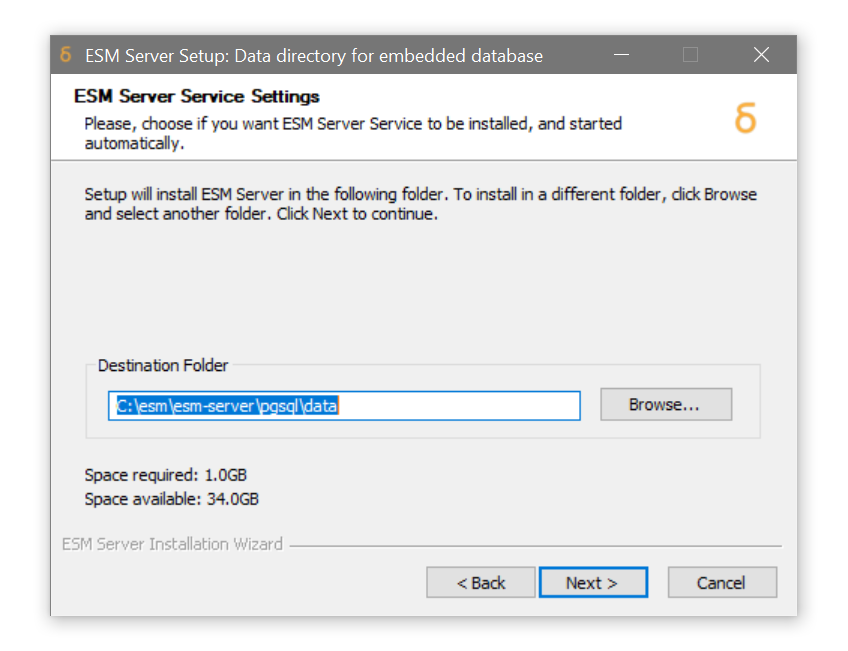
Specify the target location for the embedded database tablespace, if it differs from the SAS Enterprise Session Monitor server. If you have provisioned a separate location for storage of SAS Enterprise Session Monitor data, enter it here.
Click Next -
Specify the target location for the embedded database logs. In most cases the default value will suffice here.
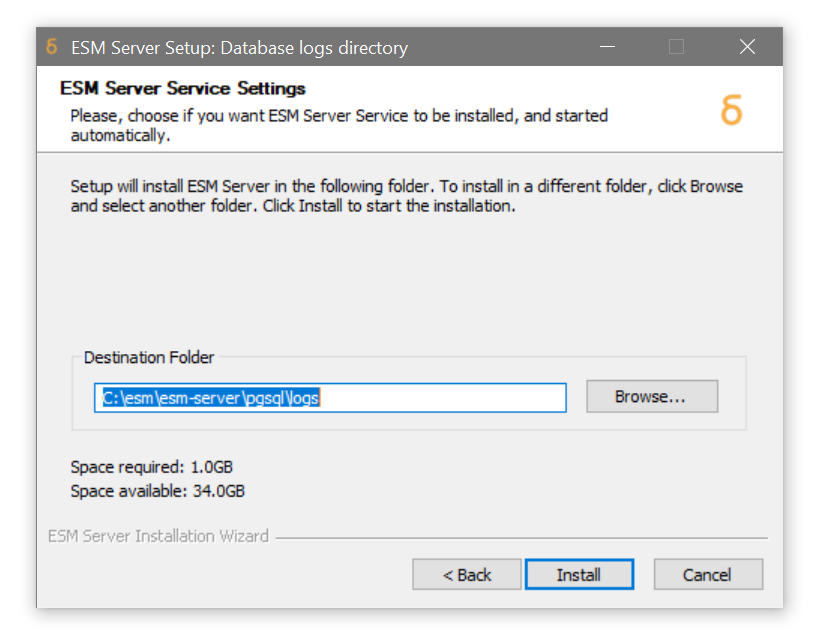
Click Install -
The SAS Enterprise Session Monitor Server installation will now take place. This may take a few minutes. As the services are added they should have a return code of
0, as per the following screenshot. This is the desired result.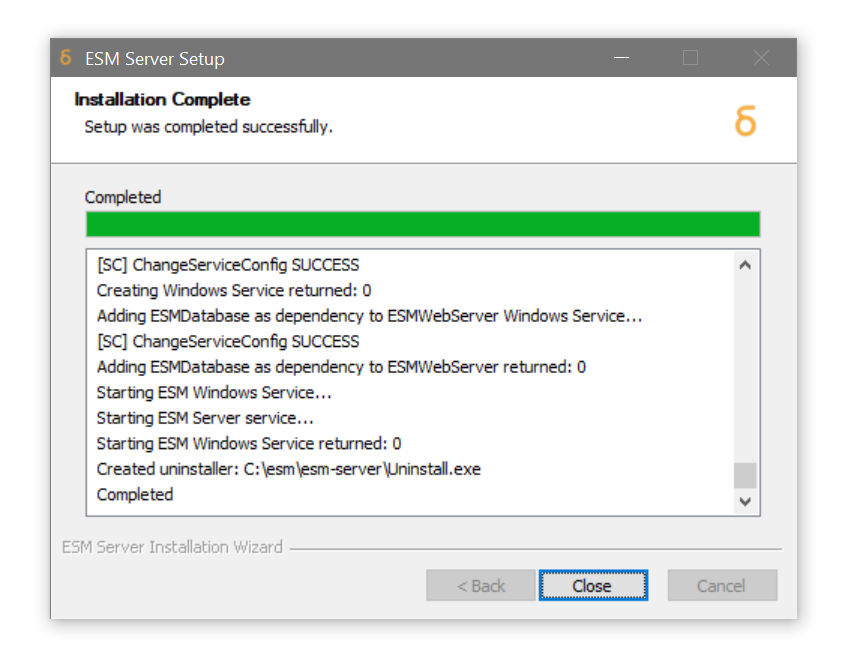
Click Close
Note
It will take up to two minutes for the web interface to become accessible, as the SAS Enterprise Session Monitor Web Application is deployed into its Application Server for the first time. During this deployment, a java process owned by the SAS Enterprise Session Monitor installation user will consume a lot of CPU. Once this process has subsided, the application will be ready and accessible via the URL provided.
Validating the Database Connection
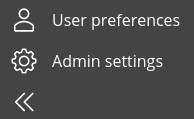
- Click on Admin Settings button in the Menu (bottom left)
-
Enter the SAS Enterprise Session Monitor Administrator username and password you configured during installation
-
Select Database Maintenance from the list of available tabs
-
Verify that the application is connecting to the database correctly, by checking the reported Database Size:

The size of the database should be reported, showing a good connection between the SAS Enterprise Session Monitor Server and the SAS Enterprise Session Monitor Database and normal operation of the SAS Enterprise Session Monitor Server application.
Note
This concludes the SAS Enterprise Session Monitor Server Installation and Configuration steps. Now proceed with the SAS Enterprise Session Monitor Agent installation and configuration steps for each node to be monitored, as outlined in the SAS Enterprise Session Monitor Agent Installation Guide for Windows.
Server Administration
Starting and Stopping the SAS Enterprise Session Monitor Server Service
Using Windows Service status
If the SAS Enterprise Session Monitor Server is installed as a service, the service status can be verified using the Windows Services manager. To check the service status, do the following:
-
Click Start
-
In the search box type
servicesto locate the Windows Services manager application -
Right click Services and click Run as Administrator
-
In the services window which appears, scroll down the list to the "SAS Enterprise Session Monitor Web Server" entry. This should have a status of Started
-
The service can be started and stopped from the Windows Services manager similarly to other services.
Using the Command Line
Note
cmd.exe does not support UNC paths. Use Windows Powershell to issue the following commands when the SAS Enterprise Session Monitor Server installation path is not mapped to a Windows drive letter.
-
Click Start
-
In the search box type
powershellto locate the Powershell program -
Right-click the Windows Powershell program and click Run as Administrator
-
At the command prompt, navigate to the location of the installed esm agent binaries. e.g.
cd c:\esm\esm-server\bin -
If SAS Enterprise Session Monitor Server is installed and running as a Windows Service, the service can be stopped by issuing the "stop-service" command:
If SAS Enterprise Session Monitor is not installed or running as a Windows Service, it can be stopped by issuing the "stop" command:C:\esm\esm-server\bin> .\esm-server.bat stop-service Stopping SAS Enterprise Session Monitor Server service...C:\esm\esm-server\bin> .\esm-server.bat stop Stopping ESM Server ... Waiting for the domain to stop .. Command stop-domain executed successfully. -
To start the SAS Enterprise Session Monitor Server Windows Service from the command line:
Similarly to the stop command above, SAS Enterprise Session Monitor Server can be started independently of the Windows Service manager by issuing the "start" command:C:\esm\esm-server\bin> .\esm-server.bat start-service Starting SAS Enterprise Session Monitor Server service...C:\esm\esm-server\bin> .\esm-server.bat start Starting SAS Enterprise Session Monitor Server ... Waiting for domain1 to start ......................................... Successfully started the domain : domain1 domain Location: C:\esm\esm-server\esm-core\glassfish\domains\domain1 Log File: C:\esm\esm-server\esm-core\glassfish\domains\domain1\logs\server.log Admin Port: 14848 Command start-domain executed successfully.
Uninstall SAS Enterprise Session Monitor Server
-
First ensure ESM Server is not running by issuing the stop server command. See Starting and Stopping the SAS Enterprise Session Monitor Server Service for further details
-
Navigate to the installation location SAS Enterprise Session Monitor Server E.g.
C:\esm\esm-server -
Run the
Uninstall.exeexecutable to uninstall the application.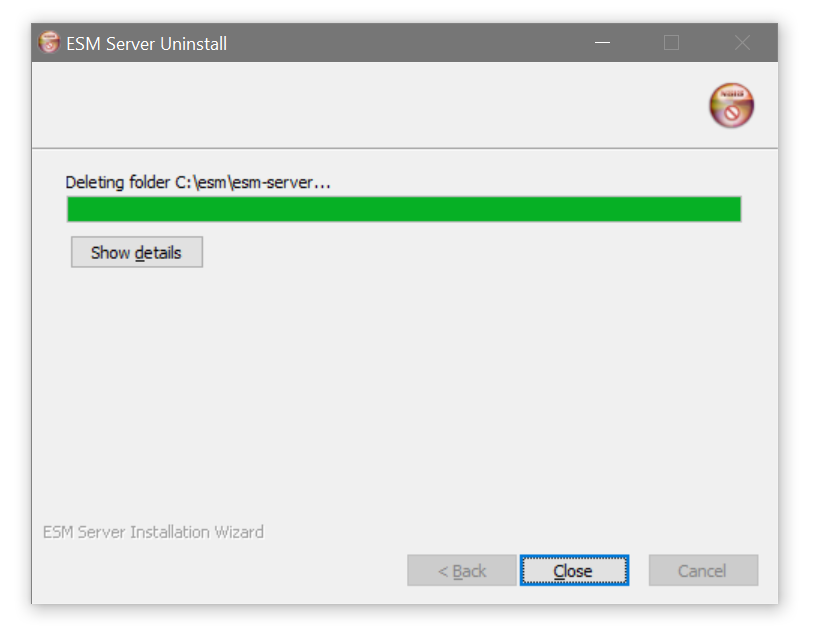
-
Click Close.
SAS Enterprise Session Monitor Agent
System Requirements
Supported versions of Windows
- Windows Server 2003
- Windows Server 2008 32bit (Service Pack 1 minimum)
- Windows Server 2008 R2 64bit (Any Service Pack)
- Windows Server 2012
- Windows Server 2016
- Windows Server 2019
- Windows XP Professional SP3 32bit
- Windows 7 64bit
- Windows 8 64bit
- Windows 10
Supported versions of SAS®
SAS Enterprise Session Monitor is compatible with all recent versions of SAS. The minimum recommended version of SAS is SAS v9.1.3; however, as SAS Enterprise Session Monitor Agents monitor sessions at the process level, SAS Enterprise Session Monitor is able to monitor earlier versions of SAS where necessary. Some custom configuration may be required.
Installation Requirements
-
Approximately 850 MB disk space (including logs)
-
A service account under which to run the SAS Enterprise Session Monitor Agent service. SAS Enterprise Session Monitor requires an account with the following:
-
Administrator or elevated rights. If you wish to use SAS Enterprise Session Monitor to terminate SAS sessions from the SAS Enterprise Session Monitor interface, ensure the account under which the agent service is running has the required permissions to control the SAS services
-
A centrally managed or non-expiring (recommended) password
-
Run as service capability
-
Read/Write access to the target installation directory and sub directories
-
-
A running SAS Enterprise Session Monitor Server. During installation the agent will validate the connection to the target server. Please install, configure and start the SAS Enterprise Session Monitor Server first
-
The hostname/IP address and port number of the SAS Enterprise Session Monitor Server
-
Access to a web browser
-
If a firewall is configured, the SAS Enterprise Session Monitor Server HTTP port, default 18080 (selected during SAS Enterprise Session Monitor Server installation) will need to be opened for communication to the target SAS Enterprise Session Monitor server.
Agent Installation
Information about multi node deployments
For Grid or multi-node deployments of SAS Enterprise Session Monitor, it is recommended to install the SAS Enterprise Session Monitor Agent to a clustered file system, accessible by all nodes in the grid. The installation procedure only needs to be run once on the first grid node to configure the agent installation directory. On each subsequent grid node, the Windows service and node events location can be registered by running a batch script.
Information about single node deployments
Alternatively for single node installations or installs where local agent installation is sufficient, the SAS Enterprise Session Monitor Agent can be installed to file system local to the node being monitored.
SAS Enterprise Session Monitor Events
The SAS Enterprise Session Monitor Agent runs on each SAS Application Server node and is responsible for collecting process and server events and metrics, and submitting them to the SAS Enterprise Session Monitor Server Application. Each node has a dedicated events sub directory which the agent monitors. In grid/multi-node installation, the event directories on a clustered file system may look like this:
\\filesystem\ESM\esm-agent\events\**node1**\
\\filesystem\ESM\esm-agent\events\**node2**\
\\filesystem\ESM\esm-agent\events\**node3**\
Windows Server short names and SASWORK monitoring
In order to utilise the SASWORK monitoring feature of SAS Enterprise Session Monitor, please ensure that SASWORK is configured to point to a disk volume with short names disabled
To verify the location of SASWORK and determine short name status, run the following SAS code from an interactive or batch session: %put %sysfunc(getoption(work));
C:\Users\ADMINI~1\AppData\Local\Temp\2\SAS Temporary Files\_TD2692_WIN2008R2N1_
If the output contains the tilde ~ character similar to the output above, then SASWORK is configured to point to a disk volume with short names enabled.
To verify short name status at a system level, A system administrator can query short name status by doing the following:
At a command prompt with elevated/Administrator privileges, issue the following command to query the short name setting:
C:\WINDOWS\system32>fsutil.exe 8dot3name query
The registry state is: 2 (Per volume setting - the default).
C:\WINDOWS\system32>fsutil.exe 8dot3name query C:
The volume state is: 0 (8dot3 name creation is enabled).
The registry state is: 2 (Per volume setting - the default).
For compatibility reasons, SAS Enterprise Session Monitor requires SASWORK to be mounted on a disk volume with short names disabled. As SAS requires and recommends short names to be enabled for application of future maintenance releases and patches, SASWORK must be moved to a disk volume different to that of the SAS binaries, with short names disabled. See the following Microsoft Tech Net article for further details on the performance implications of having short names enabled: Disabling Short Names.
Unpacking the installation package
Download the appropriate SAS Enterprise Session Monitor agent installation package for your 32-bit or 64-bit Windows operating system. Installation packages can be obtained by signing in to the Boemska Downloads site at https://boemskats.com/esm or by contacting SAS Technical Support.
Unpack the archive to your desired location. For completeness, this guide assumes a target location of:
\\filesystem\esm-agent-installer\
First/Primary node installation
-
Log on to the server using the nominated account with the required privileges (see installation requirements for more details)
-
Open the destination folder of the unpacked installation package (\\filesystem\esm-agent-installer) and double click the
esm-agent-setup.exeexecutable to start the SAS Enterprise Session Monitor Agent Installation Wizard.Note
You may be prompted to grant the SAS Enterprise Session Monitor Installation Wizard elevated privileges. This is required in order to deploy the SAS Enterprise Session Monitor Agent as a Windows Service.
-
You will be presented with a Welcome Screen.
Click Next to proceed
-
You will now be presented with a License Agreement. You must click agree to the terms set out in the license agreement in order to continue with the installation, by clicking the I Agree button.
-
The SAS Enterprise Session Monitor Agent Settings Information screen is now shown
-
Enter the hostname or IP address of the SAS Enterprise Session Monitor server in to which this agent will report
-
Enter the port on the ESM server for the agent to use (18082 is default)
-
For the next step, the format in which SAS Foundation reports the hostname for each node is needed. This can be sourced by running the following code from an existing SAS session. This value is case sensitive!
Specify a different hostname only if you wish to report node statistics using a different hostname value. Each agent hostname reporting into an ESM server instance must be unique.%put &syshostname.; -
Leave the Disks to monitor blank to allow SAS Enterprise Session Monitor to auto detect, or specify each disk drive letter separated by a semi colon. Important: drive letters must be specified in upper case, with no trailing slash. For example: E:;F:;
-
Click Next to proceed
-
-
The SAS Enterprise Session Monitor agent will now attempt to connect to the specified SAS Enterprise Session Monitor server. If the connection is successful you will be prompted to select the installation path of the agent. If the connection attempt fails, the message
Connection to <server>:<port> could not be establishedwill be displayed. Please see Connection Failure in the Troubleshooting section for details on how to resolve this. -
Specify the target install location for the SAS Enterprise Session Monitor agent using the file browser. A new folder can be created from the browse window if necessary (e.g.
\\filesystem\esm). The installer will automatically create anesm-agentsub folder within the selected destination folder (e.g.\\filesystem\esm\esm-agent) -
Click Install. The installer will now unpack the required files to the specified directory and create and start the SAS Enterprise Session Monitor Agent Windows service.
-
Verify the SAS Enterprise Session Monitor Agent service installation and start up by checking the installer log window. The following lines should be present at the end of the log:
Creating service... Creating service returned: 0 Starting service... Starting service returned: 0 -
Use a web browser to connect to your SAS Enterprise Session Monitor server web client (e.g.
http://esmserver:18080/esm) to verify the agent has started, connected and is reporting data. You should see a node with the specified agent hostname listed in the Live view. Clicking the node will load the live graph.
If required, now follow the service installation for subsequent grid nodes, or repeat the installation steps for non-clustered file systems on those nodes.
Reminder of a previous Note
Once the SAS Enterprise Session Monitor Agent installation is complete for all nodes, further configuration of SAS is required for full integration. This is detailed in the document titled Configuring SAS for SAS Enterprise Session Monitor.
If the SAS Enterprise Session Monitor Agent failed to install, or the service fails to start, please check the Troubleshooting section for further information.
Windows Service installation for subsequent nodes on shared filesystems
Note
Skip this step if the SAS Enterprise Session Monitor Agent is installed on a local file system
Following the successful installation and validation of the SAS Enterprise Session Monitor Agent on the first shared (e.g. SAS GRID) node, subsequent nodes only require the Windows service and Event directory to be registered.
-
Log on to the server using the nominated account with the required privileges (see installation requirements for more details)
-
Navigate to the location of the installed SAS Enterprise Session Monitor Agent binaries. e.g.
//filesystem/esm/esm-agent/bin -
Right click the
esm-agent.batfile and select Run as Administrator -
The interactive batch file will prompt you for a command. Type
installand hit Enter. The installer will auto detect the node hostname and install the windows serviceEnter The Command (start : stop : restart : install : remove : reinstall : query) : install Hostname detected: WIN2008R2N1 wrapper | SAS Enterprise Session Monitor Agent installed. Press any key to continue . . . -
Press any key to close the command prompt window
-
To start the service, right click the
esm-agent.batfile and select Run as Administrator -
At the prompt type
startto start the SAS Enterprise Session Monitor Agent service -
The SAS Enterprise Session Monitor Agent service will now start
-
Use a web browser to connect to your SAS Enterprise Session Monitor server web client (e.g.
http://esmserver:18080/esm) to verify the agent has started and is reporting in. You should see a node with the specified agent hostname listed in the Live view. Clicking the node will load the live graph.
Repeat the Windows Service Installation steps for each node as required, verifying each node is displayed in the ESM server web client.
The same note on configuration, again
Once the SAS Enterprise Session Monitor Agent installation is complete for all nodes, further configuration of SAS is required for full integration. This is covered in the document titled Configuring SAS for SAS Enterprise Session Monitor.
If the SAS Enterprise Session Monitor Agent failed to install, or the service fails to start, check the Troubleshooting section for further information.
Agent Administration
Starting and Stopping the SAS Enterprise Session Monitor Agent service
Using Windows Service status
The SAS Enterprise Session Monitor Agent is installed as a service. The service status can be verified using the Windows Services manager. To check the service status, do the following:
-
Log on to the server using the account with the required privileges
-
Click Start
-
In the search box type
servicesto filter the list of applications -
Right click Services and click Run as Administrator
-
In the services window which appears, scroll down the list to the
ESM Agententry. This should have a status of Started -
The service can be started and stopped from this interface by right clicking and changing the status
Using the Command Line
Note
cmd.exe does not support UNC paths. Use Windows Powershell to issue the following commands when the SAS Enterprise Session Monitor Agent installation path is not mapped to a drive letter.
-
Click Start
-
In the search box type Powershell to filter the list of applications
-
Right click the Windows Powershell program and click Run as Administrator
-
At the command prompt, navigate to the location of the installed esm agent binaries. e.g.
\\filesystem\esm\esm-agent\bin -
Run the esm-agent.bat file by issuing the following command:
.\\esm-agent.bat -
The interactive batch file will prompt you to enter a command. Type
queryand hit Enter.
PS>cd \\filesystem\esm\esm-agent\bin
\\filesystem\esm\esm-agent\bin>esm-agent.bat
Enter The Command (start : stop : restart : install : remove : reinstall : query) : query
Hostname detected: WIN2008R2N1
wrapper  | The ESM Agent Service is installed.
wrapper  |   Start Type: Automatic
wrapper  |   Interactive: No
wrapper  |   Running: Yes
Press any key to continue . . .
-
The appropriate commands can also be specified when invoking the script as follows:
-
The agent can be stopped with the following command:
.\esm-agent.bat stop -
Start the agent with the following command:
.\esm-agent.bat start -
The agent can be restarted with the following command:
.\esm-agent.bat restart
Uninstall SAS Enterprise Session Monitor Agent
Grid/Multi-node installations
The SAS Enterprise Session Monitor Agent service must be uninstalled from each node. For shared filesystem installations (i.e. SAS GRID), this must be performed using the command line.
The same note from earlier on cmd.exe and UNC paths
cmd.exe does not support UNC paths. Use Windows Powershell to issue the following commands when the SAS Enterprise Session Monitor Agent installation path is not mapped to a drive letter.
-
Click Start
-
In the search box type Powershell to filter the list of applications
-
Right click the Windows Powershell program and click Run as Administrator
-
At the command prompt, navigate to the location of the installed esm agent binaries. e.g.
\\filesystem\esm\esm-agent\bin -
Remove the SAS Enterprise Session Monitor Agent Windows service by issuing the following command:
esm-agent.bat remove -
Repeat steps 1 to 5 for each node until all SAS Enterprise Session Monitor Agent Windows services have been removed
-
If required, the original installation folder and its contents can now be deleted
Using the Uninstall Wizard
For single node or non-clustered file system installations, the uninstall wizard can be used to remove the SAS Enterprise Session Monitor Agent installation as follows:
-
Access the original installation folder (e.g.
C:\esm\esm-agent). -
Right click the
Uninstall.exeexecutable and select Run as Administrator. -
This will stop the SAS Enterprise Session Monitor Agent and remove the "SAS Enterprise Session Monitor Agent” Windows service.
-
If required, the original installation folder and its contents can now be deleted.
This concludes the removal of the SAS Enterprise Session Monitor Agent.
Warning
Where removing SAS Enterprise Session Monitor permanently, remember to remove any SAS Enterprise Session Monitor specific configuration from your SAS Configuration scripts. For more details, refer to document titled Configuring SAS for SAS Enterprise Session Monitor.